
3d Printer - part 8
Progress continues on my 3d printer.
A lot of research and learning has been done, the learning curve with 3d printers is very steep! However my fifth print came out very well, with only a few minor flaws:

It seems that Printrun sometimes pauses on OS X, unless it is always in the foreground. In other words, you can't really do anything else on the computer at the same time. For a modern powerful computer and multitasking operating system this seems odd.
Extruder improvements
I quickly discovered that even my improved grippy roller for the extruder wasn't up to snuff. The sandpaper gripped the filament quite well, but then just sanded it smooth, clogging up the sandpaper and leaving it smooth! So I went back to the drawing board and dug out the Dremel.

I made up a jig out of spare wood, cable ties and masking tape which holes the steel rod in position, and allows me to position a spinning cutting disk at right angles to the shaft. I kept the cog on the shaft, and using a tooth pick to index against the teeth. I then took a whiteboard marker and coloured every 3rd tooth. After firing up the Dremel, I would gently lower it down to cut a set distance into the shaft, lift it back up, rotate to the next coloured tooth, and repeat. After a few minutes I have a shaft with dozens of lines around it, perfect for gripping the soft plastic filament.
I swapped over the shafts and did a test print; huge improvement!
Problems set in
I've spent much of the rest of the week solving a variety of problems with the printer. First up, it refused to talk to the computer. After much testing and debugging, I determined that the USB socket on the Arduino was faulty. I managed to half desolder, half rip it off the board and set about finding a replacement. But while looking I decided to test the original plug and it seemed to work just fine. That suggested faulty soldering, so I had a go at soldering it back on. A few minutes later and my printer was working again!
The following day I went to do another print and this time the entire USB plug fell off! Unfortunately when I'd been desoldering it the first time, some of the securing pads on the circuit board had fallen off, so it was a much weaker this time around... and then it just fell off. So I mixed up some 5 minute epoxy (my favourite substance), glued the socket back on and touched up the solder joints. I had dinner and then the printer was back in action.
A couple of prints over the week had vertical sides, or at least that's what they had on the computer. Once printed out they had nearly 45 degree sides, which didn't make much sense. I scratched my head, tried some different feed rates and a few other things but to no avail. I then discovered while watching the printer that the whole print head moved when the filament was retracted and then extruded again. Ah ha! I had never actually properly secured the hot head to the rest of the printer. So some quick work in the garage with the drill and Dremel and some more 5 minute epoxy, plus a couple of cable ties, and I had a much more secure print head.
Today I added in a fan to cool down the filament so that small details, like cat ears, would solidify quicker and have better definition. A very rough bracket was made from cardboard, cable ties, masking tape and bolts and strapped onto the head of the printer. Initial cat-tests show remarkably improved ears.
After completing the first test print today, I ran into an interesting problem... the entire machine just died! One minute it was sitting there waiting for commands, the next it was completely unresponsive. I'd noticed earlier that the ammeter had stopped working on the power supply, although the rest of the supply was still working fine so didn't think anything of it. While debugging the problem I couldn't work out how a 10A power supply was only outputting 2V, barely enough to get the master power LED to light, let alone to power any of the supply rails. Confused I was. I was weary of having a 10A power supply hooked up to a machine that appeared to have faulty supply rails, however unplugging all the modules did nothing. At this point I turned my attention to the power supply and opened up the ammeter dial:
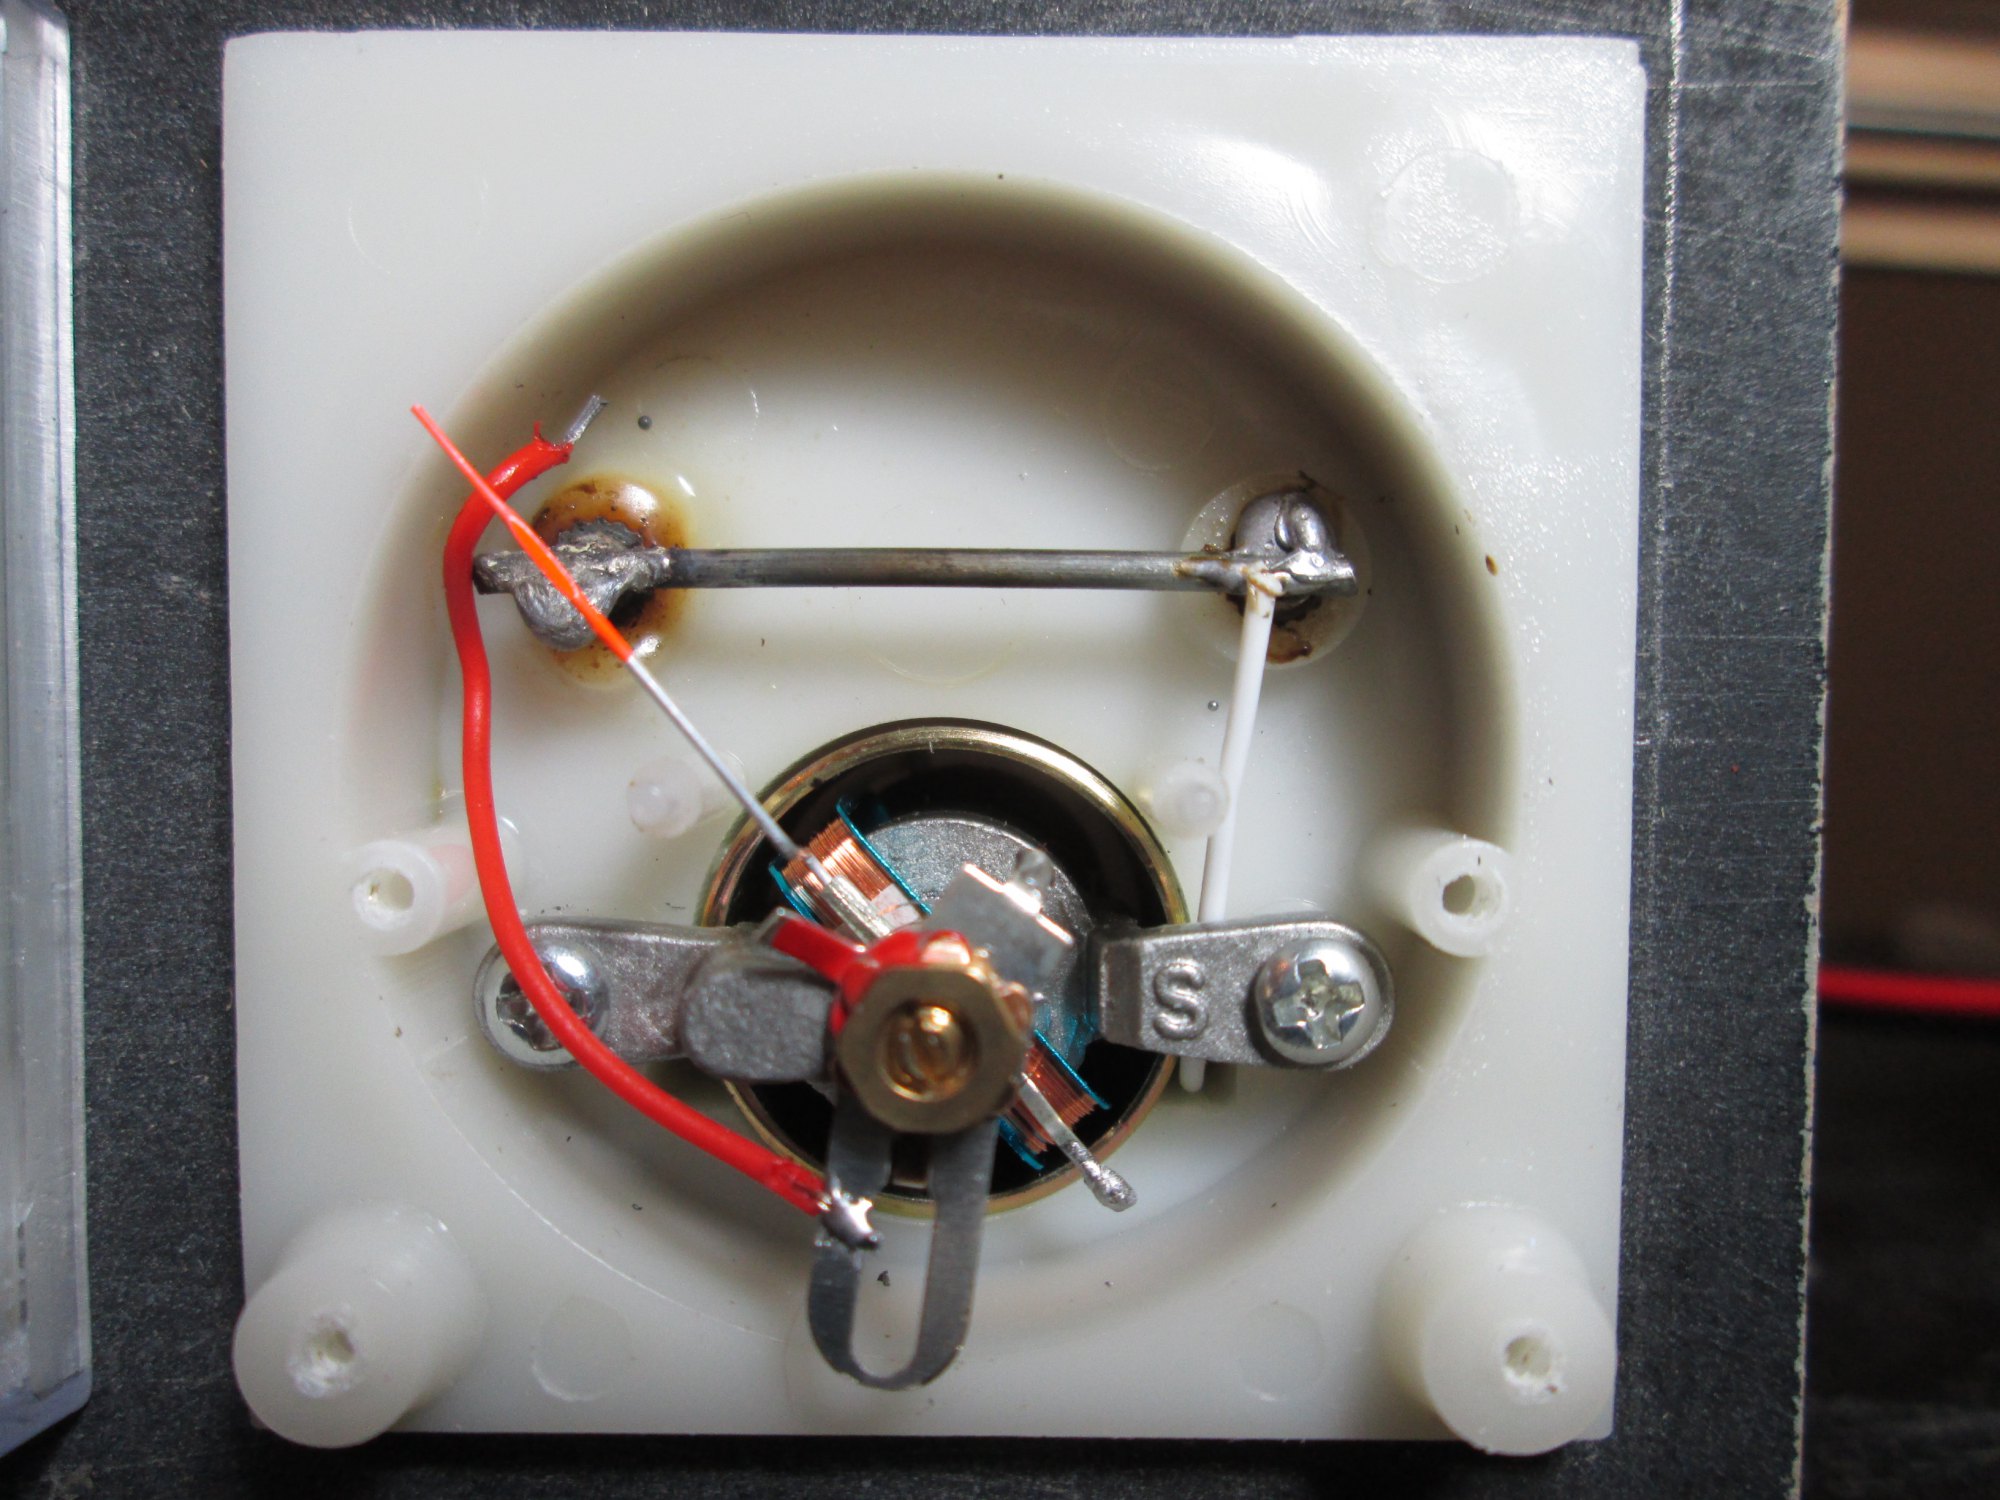
Hmm! The solid bar at the top is a current sense strip, a small "precision" resistance which produces a voltage proportional to the current flowing through it. That voltage is then used to generate an electromagnetic field, which then induces a force against the needle, rotating it against a spring. Hooke's Law, F = kx, states that the force from the spring is proportional to the distance (rotation in this case) times the spring constant, meaning that a linear relation between current and needle rotation is the result.
However looking at the meter above a few things are obvious. 1) There is a weird off-yellow discolouring at top left. You can't smell it, but there is an odd melted plastic smell too, which explains the yellow gunk and glob below. 2) The red wire to the meter is disconnected, explaining the permanently-zero reading on the meter. 3) The solder joint on the left end of the current sense strip is very poor. 4) The left end of the current sense strip isn't actually physically connected to the terminal behind it, it is only loosely touching. That would explain the mere 2V coming into my printer, and near zero current, since it was all flowing through two contacts that were only resting on each other.
I whipped out the flux and soldering iron:
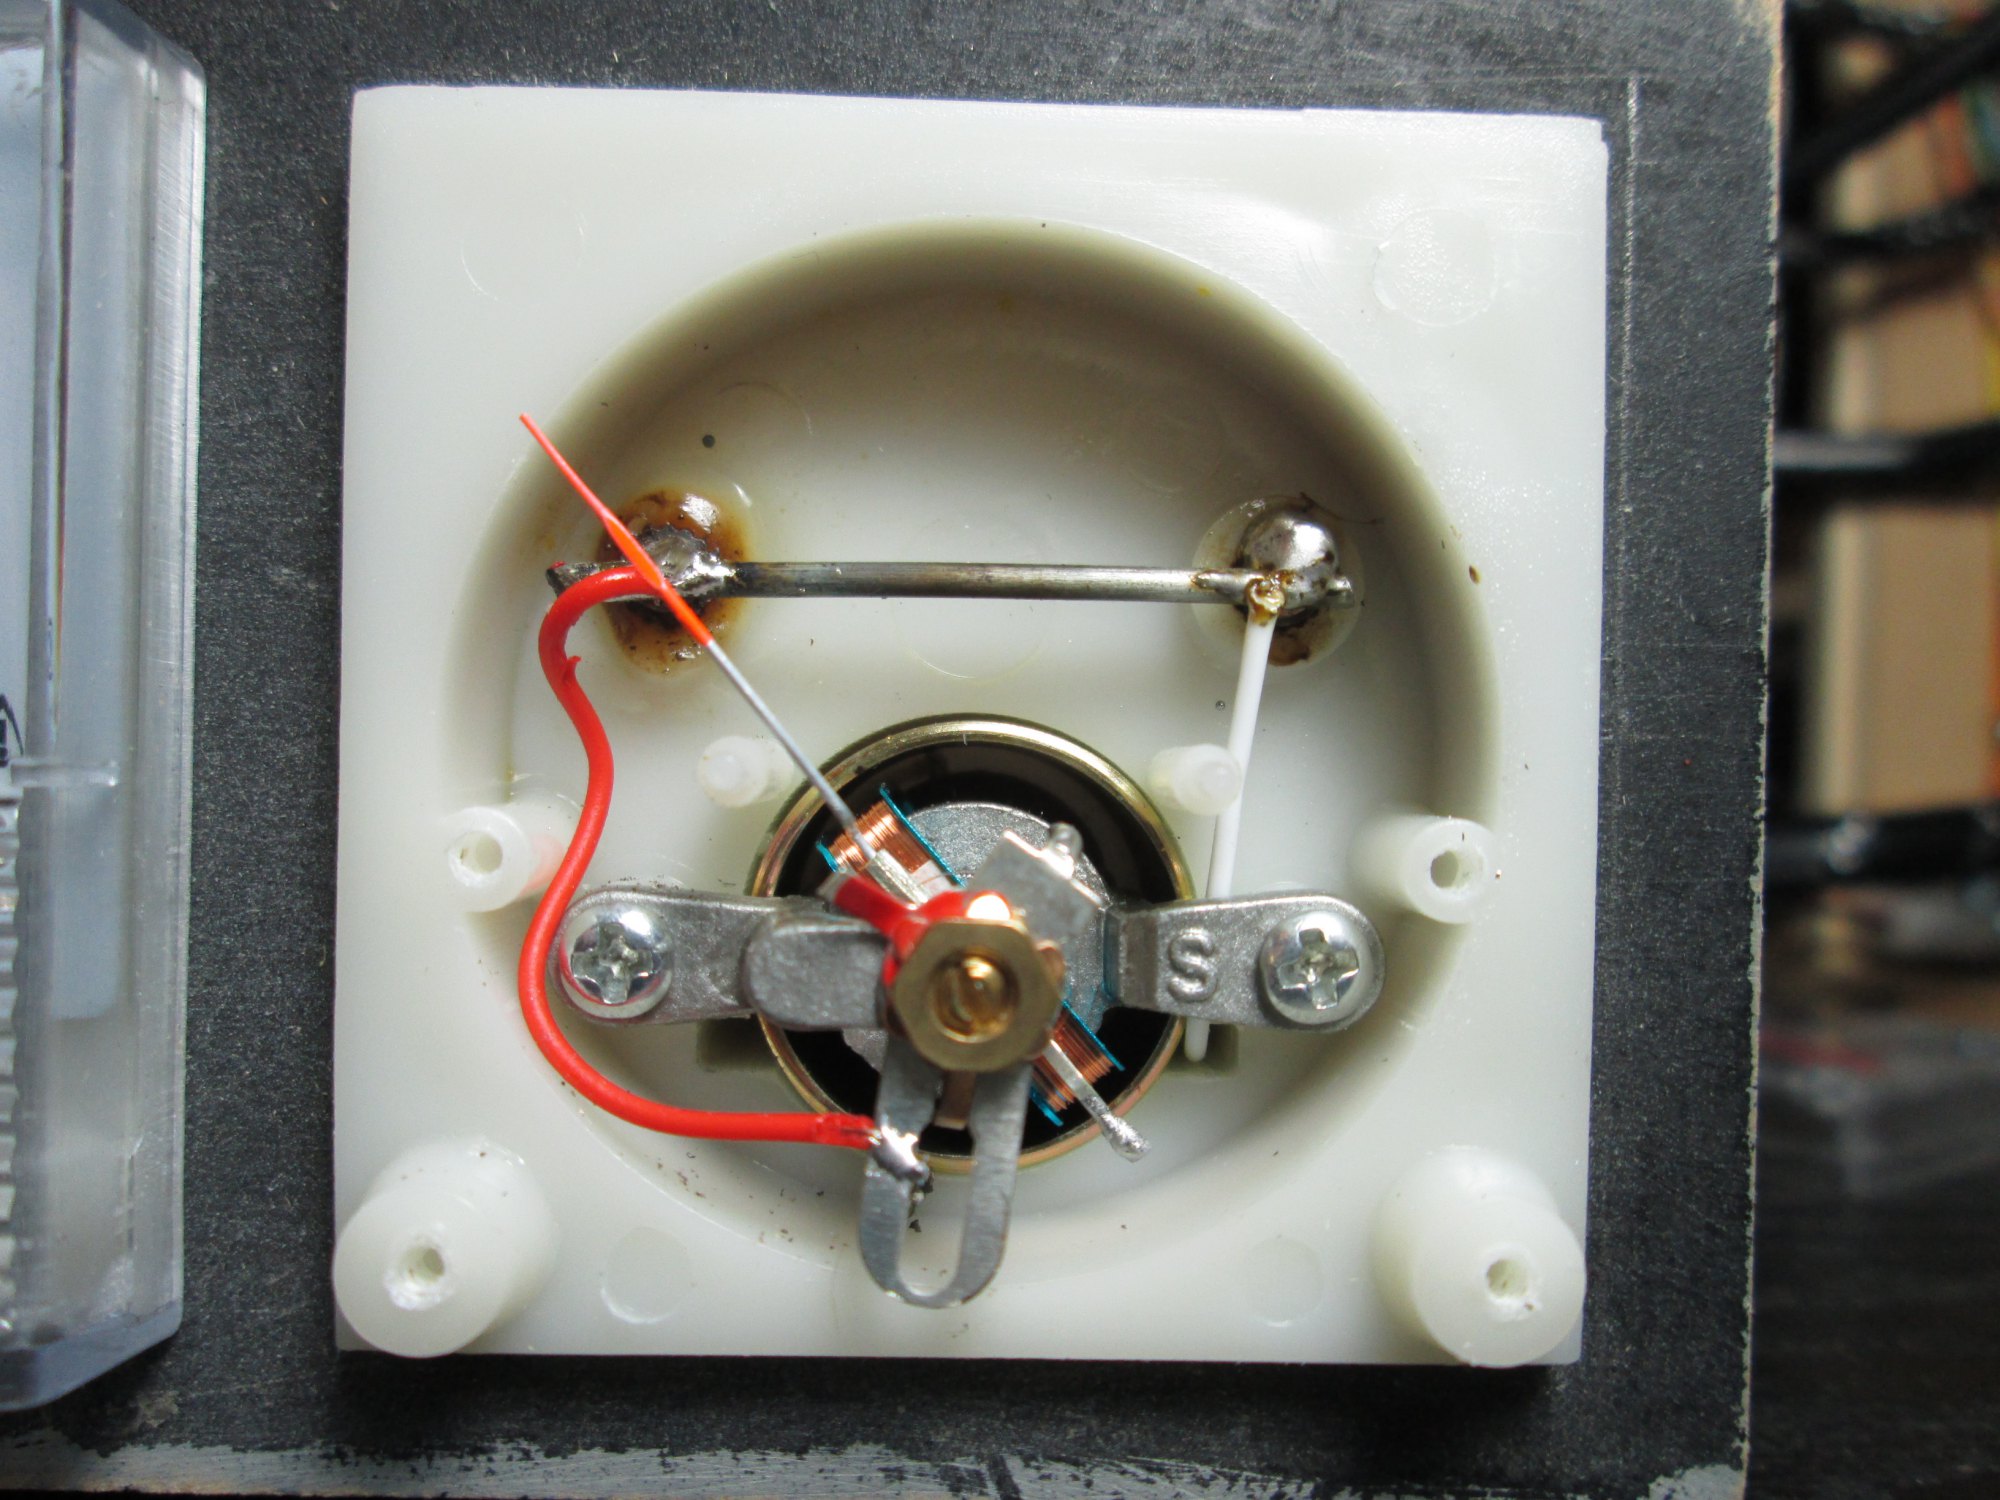
Much better! Printer resumed to 100% operation once again.
The only real problem I'm having now is that the upper levels of a print aren't as nice as the lower layers. I'm not entirely sure why, either it's a problem with the infill being too sparse, not enough filament being extruded, or something else. Testing will continue. I am almost at the point of being able to print useful objects, so I'm keen to get these issues sorted ASAP.
Leave a comment?